
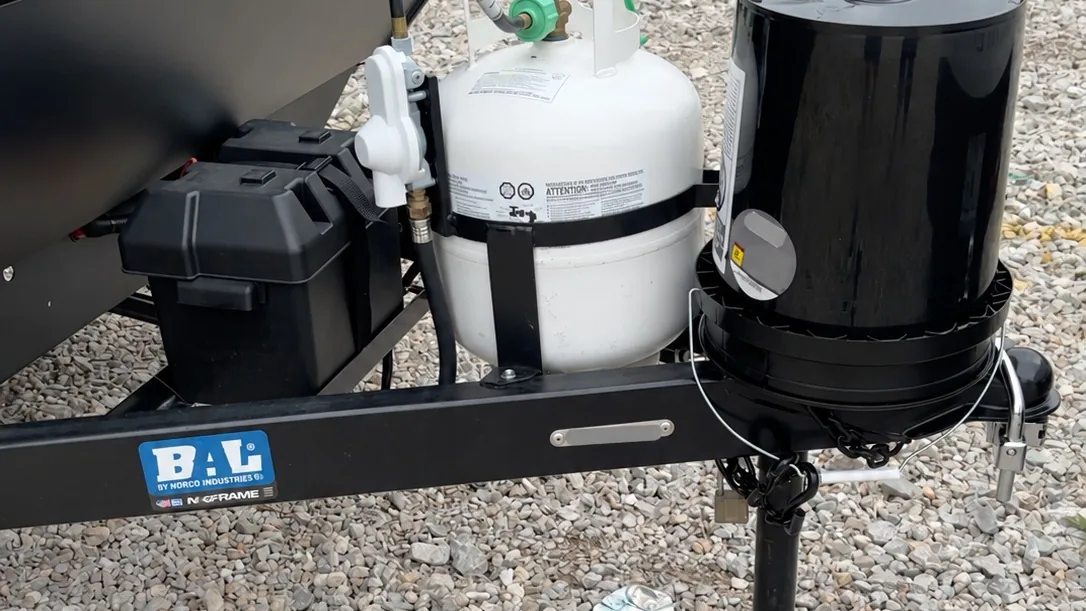
A black trailer tongue can turn gray long before the RV looks old. Road grit chips the bumper, rain settles around brackets, and winter travel adds salt to surfaces you rarely see. Protecting that steel means preserving the coating and catching damage while repairs are still small.
To protect your RV frame from rust, start with a clean, dry inspection, repair exposed steel with a compatible paint system, and reduce salt and moisture exposure. Add surface protection only where the coating manufacturer allows it. A shiny finish alone does not tell you whether the frame is sound.
This guide covers painted steel chassis rails, the A-frame tongue, and steel rear bumpers. Aluminum, galvanized parts, powder coating, and specialty factory undercoatings can require different products.
Why RV frames fade, chalk, and develop rust
Sunlight attacks the paint rather than making steel rust directly. UV exposure and weathering can change color, reduce gloss, and break down a coating’s surface. Chalking is the powdery residue that weathered paint may leave on a cloth. PPG explains fading and chalking as coating problems that can eventually call for repainting.
Rust is corrosion of the steel beneath that protective barrier. Moisture and oxygen reach exposed metal through chips, scratches, seams, or failing paint; road salt makes the environment more aggressive. Sun-exposed tongues and bumpers often show fading, while shaded undercarriage areas still rust from trapped moisture.
- Cosmetic fading: dull or gray paint that remains firmly attached. Clean it and evaluate the finish before buying rust treatment.
- Minor surface rust: localized orange-brown staining at a chip, without obvious deep pitting or metal loss. Small repairs may be suitable for DIY maintenance.
- Possible structural corrosion: heavy scaling, deep pits, holes, swollen seams, cracked welds, or distorted brackets. Stop cosmetic work and arrange professional assessment.
Inspect the A-frame, bumper, and undercarriage
Park on firm, level ground, chock the wheels, and secure the trailer using its approved procedure. Never crawl underneath an RV supported only by a jack or stabilizers. If inspection requires lifting, use the manufacturer’s lifting points and correctly rated support equipment, or have a shop do it.
Use a flashlight and inspection mirror. Start at the coupler and work rearward, checking tongue rails, welds, jack mounts, battery-tray edges, propane supports, frame crossmembers, suspension hanger areas, and bumper attachments. Look behind brackets where accessible without dismantling safety equipment.
Watch for bubbling paint, rusty streaks, loose coating, damaged wiring, and places where dirt stays wet. Check exposed bumper ends and drain openings without sealing them shut. Do not remove an enclosed underbelly merely to follow this article; ask a technician about inaccessible areas.
Photograph suspect spots and compare them at the next inspection. Deep corrosion near the coupler, suspension, or other load-bearing connections needs an RV chassis specialist before further towing. Paint cannot restore lost metal or repair a cracked weld.
Clean painted steel without damaging the finish
Work on cool surfaces in the shade. Rinse loose grit with fresh water, then wash sound paint using a mild automotive wash compatible with that finish, a soft brush, and microfiber cloths. Rinse thoroughly and let seams and brackets dry before applying anything.
Use a coating-approved degreaser only where needed, at its labeled dilution. Test first. Strong solvents, aggressive cleaners, and abrasive pads can damage factory paint or adjoining materials. A wire brush belongs in a planned rust repair, not routine washing of intact paint.
Keep concentrated water jets away from seals, bearings, brake assemblies, electrical enclosures, connectors, and underbelly seams. Protect electrical equipment from wash water and isolate power according to the RV manual when the work requires it. Never spray cleaners onto energized equipment.
After salt exposure, rinse accessible chassis areas promptly when conditions allow safe washing and drying. Lippert emphasizes regular frame washdowns; use your own trailer’s instructions for washing limits and maintenance details.
Protect factory chassis paint from UV exposure
The first layer of RV frame UV protection is intact paint. Keep it clean, touch up chips promptly, and use covered storage when practical. If the factory finish is sound, there is no automatic need to strip it or cover it with another coating.
A paint-specific wax or sealant may be an option for accessible, fully cured painted tongue or bumper surfaces only when both product and coating instructions permit it. Check whether the finish is gloss, satin, matte, or powder coated. A product designed to increase gloss can change a satin appearance or leave residue on a textured finish.
Test a small hidden area and follow the curing and reapplication directions. Do not apply automotive sealant across the entire underside, over rust, or onto moving mechanisms. Keep it off brake friction surfaces, tires, electrical contacts, hitch friction surfaces, and places awaiting paint repair.
Why 303 Aerospace Protectant isn’t the default choice
Gold Eagle lists 303 Aerospace Protectant for materials including rubber, vinyl, plastics, fiberglass, and some metal applications. It would be inaccurate to say the manufacturer forbids every painted-metal use.
However, that broad surface list does not establish compatibility with your particular chassis finish or make it a rust-repair coating. For painted steel, start with the frame maker’s guidance and a product explicitly suited to that paint. For exposed steel, use an appropriate repair system. Aerospace Protectant cannot replace missing paint, remove rust, or restore frame strength.
Repair scratches, paint chips, and minor surface rust
Deal with small defects before they spread beneath the surrounding coating. First confirm the damage is superficial. If you uncover deep pits, substantial scale, or a questionable weld during preparation, stop and have the area inspected.
- Clean before sanding. Remove dirt and grease so preparation does not grind contamination into the repair.
- Remove loose material. Use suitable hand tools and abrasives to remove flaking paint and loose rust. Feather sound paint edges without grinding away structural metal.
- Follow one compatible system. Some products require clean bare steel; others allow firmly adhering rust after specified preparation. A converter and an encapsulator are not interchangeable, and neither belongs under every primer.
- Clean again and dry. Remove dust and use the paint maker’s specified surface preparation. Keep wax, silicone residues, oil, and corrosion inhibitors away from the repair.
- Prime and topcoat as directed. Observe temperature, humidity, coat thickness, recoat windows, and cure time before washing or travel.
Mask labels, VIN markings, grounding points, wiring, propane equipment, rubber parts, and adjacent finishes. Keep paint out of coupler mechanisms and brake components. Wear eye protection, gloves, and respiratory protection specified by the product’s safety data sheet. Work with ventilation, away from sparks, flames, and hot surfaces.
Choose UV-resistant black RV frame paint
Choose a chassis coating that explicitly supports outdoor exposure, the underlying finish, and your preparation method. A matching black color is not enough. Ask the RV or frame manufacturer which touch-up system works with the original coating, especially while warranty coverage applies.
Eastwood Extreme Chassis Black Satin is one option to investigate. Its bulk-product technical data sheet specifies UV protection, clean and dry preparation, and compatibility testing on existing finishes. It excludes self-etching primers and wax or lanolin undercoatings as bases.
The bulk sheet lists best application conditions of 70–90°F with humidity at or below 50%, and at least 48–72 hours before handling; full curing can take longer. Aerosol and bulk directions differ, so follow the label and current instructions for the exact package you buy. Do not combine timing instructions from different versions.
Satin can suit a factory-style appearance, but compare a test patch after curing. Avoid assuming every rust encapsulator or epoxy primer can remain exposed to sunlight; use the specified UV-resistant topcoat where required.
Use corrosion inhibitors selectively underneath
A corrosion inhibitor can supplement RV undercarriage rust protection on approved metal areas. It serves a different purpose from a hard paint finish. Apply only after inspection, cleaning, and confirmation that the existing coating and neighboring materials are compatible.
Fluid Film’s manufacturer FAQ describes a lanolin-based, non-drying film, says it is compatible with most paints, and warns that non-oil-resistant rubber may swell. It is not formulated to remove rust. Treated surfaces require cleaning before repainting.
Keep inhibitors away from brake drums, rotors, pads, shoes, tires, exhausts, hot equipment, and hitch friction-control surfaces. Do not blanket-spray wiring, sensors, rubber bushings, factory undercoatings, or propane equipment. Obtain component-specific approval where compatibility is unclear; “most paints” does not mean every coating.
Leave drain paths open and avoid concealing cracks or identification labels. Inspect the film after washing and harsh travel, then replenish as directed. No inhibitor repairs weakened steel or eliminates future inspections.
Storage and preventive maintenance
Store on a well-drained surface when possible, and remove mud or leaves that hold moisture against steel. Covered parking reduces direct weather exposure, but still inspect for leaks, condensation, and coating damage.
If using a cover, choose a suitable breathable RV cover and secure it as instructed. Avoid wrapping the tongue in plastic that traps moisture. Do not obstruct required propane or battery ventilation. Our RV winter preparation guide helps organize the broader storage routine.
Add a quick tongue check to your campsite routine using our small travel trailer setup checklist. Keep a maintenance log with photographs, products used, and dates. That record makes recurring rust easier to spot.
RV frame maintenance frequency
This is a practical starting schedule, not a replacement for manufacturer intervals. Shorten it for coastal storage, salted roads, frequent towing, or known coating damage.
| When | What to do |
|---|---|
| Before each trip | Check visible tongue, mounts, and bumper for damage or changes. |
| After salty or muddy travel | Rinse accessible areas safely; dry and inspect. |
| Monthly while in use | Check paint chips, seams, and previously repaired spots. |
| At seasonal preparation | Inspect accessible undercarriage; repair minor coating defects. |
| During storage visits | Check moisture, debris, covers, and developing corrosion. |
| At professional service | Ask for inspection of inaccessible or questionable structural areas. |
Recommended RV frame maintenance supplies
- Flashlight, inspection mirror, wheel chocks, and maintenance log.
- Compatible automotive wash, soft brush, microfiber cloths, and hose.
- Gloves, eye protection, and product-specified respiratory protection.
- Masking materials, hand abrasives, and approved surface cleaner.
- Compatible primer and UV-resistant black chassis topcoat for repairs.
- Optional paint-specific protection or corrosion inhibitor for approved areas.
Buy for the condition you actually find. Intact paint may need cleaning; chipped steel needs preparation and repair. Product mentions here are editorial references, not claims of firsthand testing.
Frequently asked questions
Is a gray RV tongue already rusting?
Not necessarily. Fading and chalking affect the coating. Clean it, then check for exposed steel, brown rust, bubbles, or lifting paint.
Can I paint directly over RV frame rust?
Only if the specific coating permits the remaining rust after its required preparation. Never cover loose scale or use paint to hide structural deterioration.
Should I spray the whole underside with Fluid Film?
No. Identify approved metal areas and protect brakes, hot surfaces, rubber, and sensitive equipment from overspray. Confirm compatibility before application.
Will ceramic sealant stop existing rust?
No. Paint sealant is not a rust-removal or structural-repair treatment. Repair damaged steel and coating first, then consider protection suitable for the cured finish.
Keep small paint problems from becoming bigger repairs
Good RV chassis maintenance starts with noticing changes: wash off contamination, preserve sound paint, repair small chips correctly, and get serious corrosion assessed. Make it part of preparing for the road instead of waiting for the tongue to look badly weathered.
Ready for your next trip? Join the OWS Club for the FREE 25-Point RV Departure Checklist and practical RV ownership updates. Keep your maintenance routine and departure walkaround working together.
Get the FREE RV Departure Checklist
Make frame care part of seasonal preparation
Before storage, pair your coating inspection with the seven-area RV winter prep checklist. Plumbing needs its own procedure: use the travel trailer winterization guide alongside the instructions for your installed equipment. Frame protection and plumbing winterization solve different problems; completing one does not complete the other.
Keep building capability
Useful notes for the road ahead.
Practical RV travel advice, connectivity tips, preparedness guides, and carefully selected gear recommendations—delivered to your inbox. Join the OWS Club and get the free 25-Point RV Departure Checklist. Practical advice. No inbox clutter. Unsubscribe anytime.