
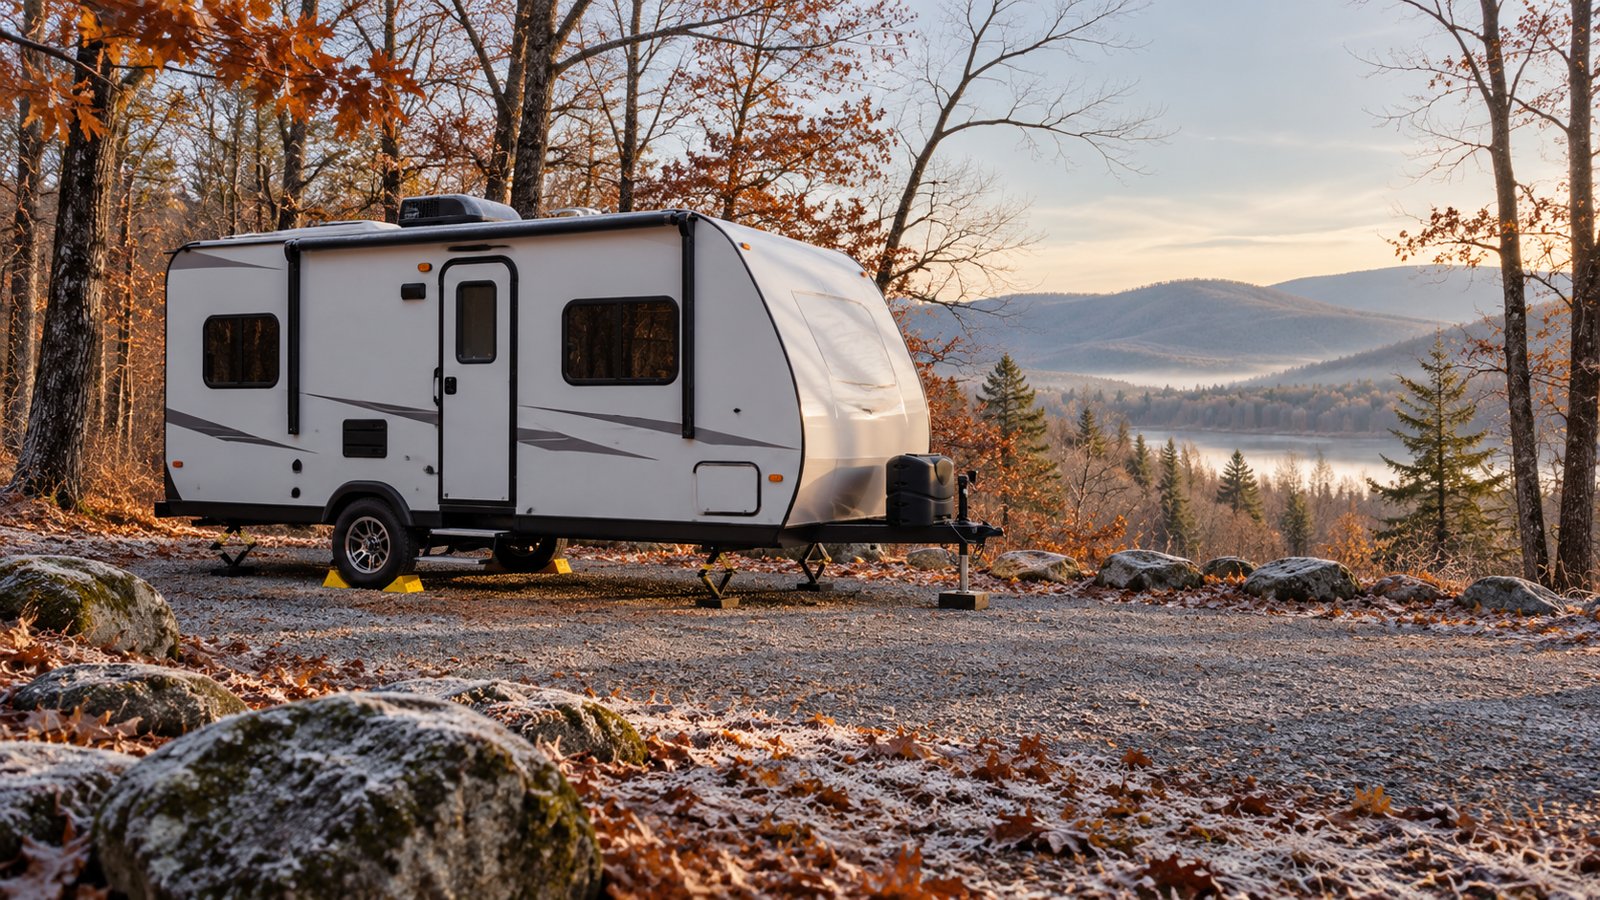
THE WINTERIZATION FIELD GUIDE
A cracked water line is a frustrating way to start camping season. Learning how to winterize a travel trailer means finding the water that draining alone can leave behind—and protecting every place it can collect.
You do not need to memorize a maze of plumbing. Start with your manuals, identify the equipment, and work through one system at a time. This beginner’s guide covers preparation, the RV antifreeze method, how to blow out RV water lines, and the small components that are easy to miss.
Before you start: know your trailer
Winterize before unprotected plumbing encounters freezing conditions. Your timing depends on weather and exposure, including where the trailer sits between trips. A warm afternoon does not cancel a freezing overnight forecast.
Park securely and chock the wheels. Find the fresh-tank drain, hot and cold low-point drains, pump and strainer, city-water inlet, heater access, and winterization pickup. Photograph the normal valve positions. Identify every water-connected fixture and appliance; walk outside as well as inside.
Gather the RV manual and separate heater, pump, toilet, filter, and appliance instructions. Write down your approved method and the lowest applicable air-pressure limit if using air. For the rest of storage—battery care, seals, moisture, and inspections—use our RV winter prep checklist.
Antifreeze or compressed air?
Both approaches remove or protect vulnerable water, but neither excuses skipping a component. Choose the procedure allowed for your trailer and installed equipment. A combined procedure may be specified; do not invent one by mixing incompatible instructions.
METHOD A
RV antifreeze
Approved plumbing antifreeze displaces water in applicable supply lines. It provides a visible check at each outlet, but correct concentration and complete coverage still matter.
Plan for: compatible pickup fittings, heater isolation where required, filters, and spring flushing.
METHOD B
Compressed air
Regulated clean air clears applicable supply branches. Water can remain in low spots, pumps, valves, or appliances, so their separate procedures matter.
Plan for: a regulator, gauge, suitable adapter, and RV antifreeze where required for traps and toilet seals.
Step 1: shut down and drain the water system
Switch off every water-heater energy source and allow the water to cool fully. Turn off the pump, disconnect city water, and relieve pressure using the equipment’s specified procedure before removing any plug, housing, or fitting.
Empty and clean black and gray holding tanks at an approved dump station. Use separate equipment for sewage and drinking water. Follow the RV instructions for valves, exposed waste piping, and any macerator; draining the tanks does not automatically drain every component.
Drain the fresh-water tank and open the low-point drains as directed. Open the applicable hot and cold faucets to admit air. Drain hoses, regulators, and portable filters separately. Catch or dispose of liquids appropriately, and keep pets away from the work area.
Do not start pumping antifreeze while drains are unintentionally open. After drainage, place each drain and valve in the position required for the next stage. Keep removed parts together and label them.
Step 2: winterize the RV water heater you actually have
Conventional tank water heaters
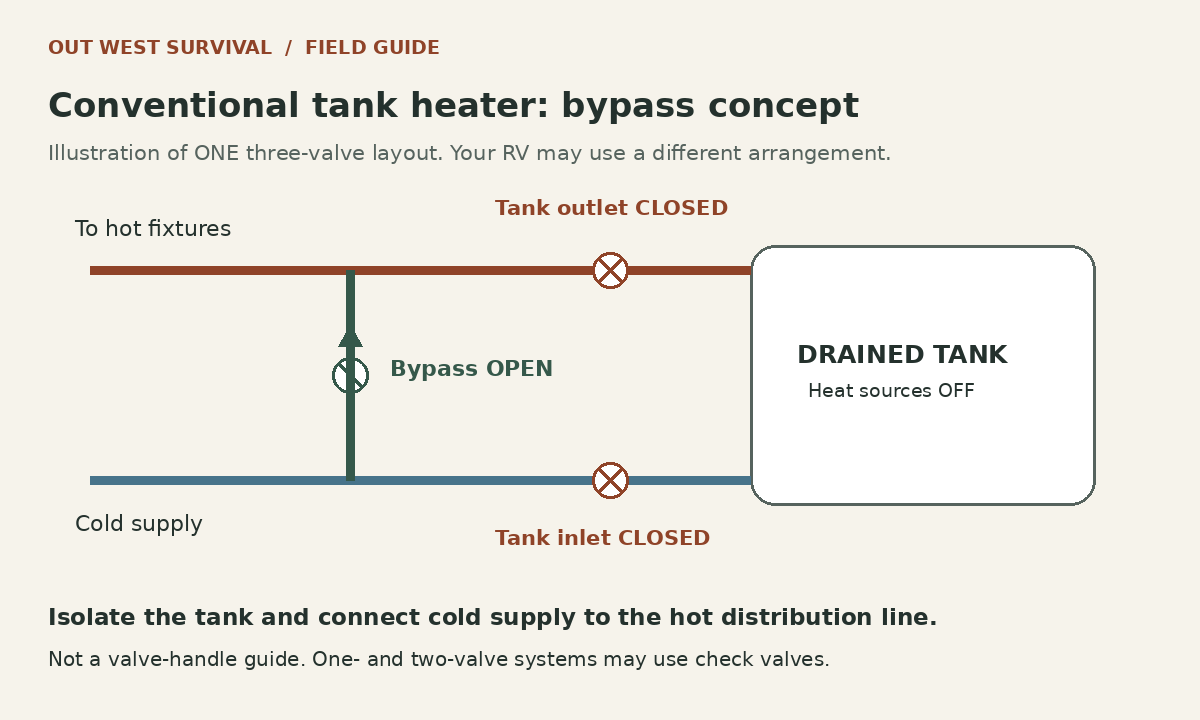
A tank heater stores water. Its drain may use a plug or an anode assembly, depending on the model. Follow its shutdown, cooling, pressure-relief, draining, and flushing instructions. Never loosen a hot or pressurized assembly. Suburban’s guidance calls for cooling and draining its tank heaters and bypassing them when using RV antifreeze.
Bypassing is not draining. A bypass redirects plumbing flow around the heater; water already inside still needs its specified drain procedure. Isolate the drained tank before circulating antifreeze when required. One-, two-, and three-valve layouts differ, and some use check valves. Follow labels and diagrams rather than copying handle directions from a photograph.
Tankless and on-demand water heaters
Small internal passages still hold water even without a large storage tank. Find the exact model’s winterization instructions before sending air or antifreeze through it. Some units require draining and isolation; others permit antifreeze under stated conditions.
For example, Truma AquaGo guidance describes cooling, depressurizing, bypassing, and draining with its Easy Drain Lever. It advises against high-pressure air or antifreeze through the unit. Suburban’s IW60 guidance permits RV antifreeze after draining if the coach manufacturer recommends it. These are different procedures, not interchangeable shortcuts.
Step 3: remove or bypass filters
Remove cartridges and use the specified bypass, dummy cartridge, or housing arrangement. Drain the housings and protect their plumbing. Follow filter instructions for replacement or storage; do not assume a wet cartridge can freeze safely.
Check dedicated drinking-water taps, refrigerator filters, portable filters, and the pump strainer. An isolated filter branch can still contain water. Do not leave a branch untreated simply because it is not part of the main faucet circuit.
Step 4A: use the RV antifreeze method
Use a product labeled for RV/marine potable-water plumbing and compatible with your equipment and expected storage conditions. Never use automotive coolant. Follow the label; ready-to-use antifreeze should not be diluted. “Non-toxic” does not mean drinkable.
- Set the system. Complete drainage, heater preparation, and filter bypasses. Set low-point drains, distribution valves, and the winterization pickup exactly as directed.
- Connect the approved pickup. A suction-side winterization kit lets the pump draw from the antifreeze container while isolating the fresh-tank branch. Keep the tube submerged. Do not pour antifreeze into the fresh tank unless your manufacturer specifically prescribes that procedure.
- Treat each branch. Turn on the pump when instructed. Open each applicable cold outlet, then hot outlet, one at a time until antifreeze reaches it as specified. Include pullout sprayers, outside fixtures, and shower hoses. Maintain the product’s required concentration rather than stopping at the first faint tint.
- Treat the toilet. Operate its valve and any sprayer using the toilet manufacturer’s winterization procedure. Protect the seal with a compatible product and the specified amount.
- Finish the remaining circuits. Address low points, the city-inlet branch, appliances, and separate flush plumbing using their approved procedures. Turn the pump off when finished.
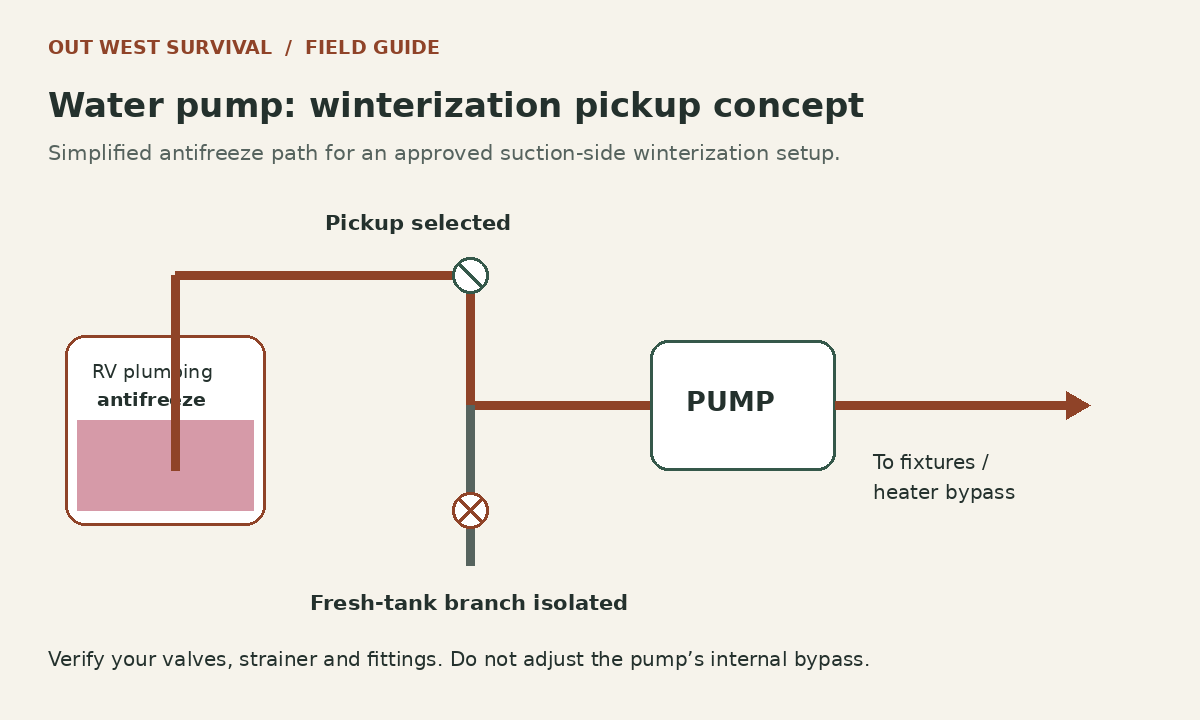
If the pump will not prime, stop and check the selected source, submerged pickup, fittings, and strainer. Do not keep running it or adjust internal settings to solve an unidentified problem. Ask for help if antifreeze disappears without reaching fixtures or a component leaks.
Step 4B: blow out RV water lines safely
Use clean air suitable for potable-water plumbing, a compatible blowout adapter, a regulator, and a readable gauge. A tire inflator’s pressure capability alone does not establish suitability for this job.
- Drain first. Prepare and isolate the heater and appliances exactly as their manuals require. Protect filters and housings.
- With the pump off, connect the adapter to the approved inlet and establish the specified outlet/drain path before applying regulated air. Never connect unrestricted compressor pressure.
- Follow your RV’s fixture sequence, working each hot and cold branch, toilet valve, showers, sprayers, and applicable low points. Keep a discharge path open while air flows. Continue and repeat only as the manufacturer directs.
- Disconnect the air supply and relieve pressure before removing the adapter or changing fittings. Place valves and drains in the specified storage positions.
Protect the pump separately. Air entering the city connection can bypass the pump, suction line, and strainer. The Shurflo 4008 manual gives a pump-draining procedure that includes disconnecting plumbing and labeling it. Follow the manual for your pump; do not assume a generic dry-running time clears it.
Compressed air does not replace the required protection for drain traps and toilet seals. Add compatible RV antifreeze in their specified amounts after completing the supply-side procedure.
Step 5: catch the parts beginners often miss
- Outside shower and kitchen: both temperatures, diverter, hose, head, and quick-connect accessories.
- Black-tank flush: a separate inlet, line, and backflow/vacuum-breaker assembly may retain water. Follow the RV procedure and its pressure limit; never connect sewage-side equipment to drinking-water gear.
- City-water inlet: check valves can leave a short untreated section. Follow the specified method. Do not depress a check valve while the system is pressurized.
- Toilet valve and sprayer: protecting the bowl alone does not protect the supply mechanism.
- Drain traps: kitchen, bathroom, shower, and washer drains where fitted. Use the equipment and product instructions for quantity.
- Specialty appliances: ice makers, washers, dishwashers, drinking-water systems, accumulators, and macerators need their own instructions. Some prohibit antifreeze. A faucet procedure cannot substitute for cycling or draining an appliance as specified.
Do a second walk with your original fixture list. Look inside storage compartments and behind approved access panels. Mark an item complete only after its particular procedure is finished; “not fitted” is different from “not checked.”
Your 12-point travel trailer winterization checklist
Tap each item as you finish. Progress stays in this browser when local storage is available; no personal information is collected by this checklist. A checked box records your work—it does not verify the plumbing.
Check items as you complete them.
Checkboxes work for this visit without JavaScript. Use your browser’s Print command or download the PDF for a paper copy. Automatic progress and saving require JavaScript.
Take the checklist to your trailer
Get the printer-friendly two-page field checklist, method reminders, and space for your RV details and notes. No signup required.
Step 6: inspect, label, and plan for spring
Check for leaks and unexplained fluid loss during the procedure. Confirm the pump and heater are off. Store drains, plugs, fittings, and faucets in the positions specified by their manuals; there is no universal “leave everything open” rule.
Record the date, antifreeze product and quantity, method, valve photos, and unresolved repairs. Label disconnected plumbing and heater controls. Before spring use, restore fittings, flush and sanitize as instructed, check for leaks, and fill and purge a tank heater before enabling heat.
Finish the wider storage tasks with our winter-prep guide and RV frame rust and corrosion guide. Check the trailer periodically. If you resume using its water system, protect it again before another freeze.
Winterization tools & supplies
Buy for your approved procedure. Look for potable-plumbing RV antifreeze, a compatible suction-side pump kit, the correct blowout adapter, a regulator and gauge, suitable clean-air equipment, and model-matched heater service parts. Add filter bypass accessories, replacement cartridges, gloves, a catch pan, and labels as needed.
Camco’s winterization supplies reference illustrates pump kits and blowout fittings. Match threads and instructions before buying. Product examples are not claims of firsthand testing. This guide contains no commission-tracked supply links.
RV winterization for beginners: common questions
How much RV antifreeze do I need?
There is no universal gallon count. Plumbing length, appliances, pickup method, and required trap quantities change the total. Use your RV instructions and product label, keep extra available, and record actual use for next year. Do not stop protecting outlets because you reached a guessed quantity.
Can I just drain the fresh-water tank?
No. That does not establish that the pump, valves, heater, branches, and traps are protected. Complete the approved procedure for every water-containing component.
Can I winterize a camper with air only?
Only use an air procedure your equipment allows. Even then, traps and toilet seals may require RV antifreeze, and the pump and appliances need separate attention.
When should I hire an RV technician?
Get help when you cannot identify valves, obtain pressure limits, access components safely, or reconcile appliance instructions. Leaks, damaged fittings, and an unknown tankless-heater procedure are reasons to stop. A documented walkthrough can make next season easier.
Make your next departure easier, too.
Join the OWS Club through our existing signup page for the free 25-Point RV Departure Checklist and practical RV travel, connectivity, and preparedness updates.
Manufacturer references & editorial notes
Reviewed October 17, 2026. Equipment-specific examples were checked against the sources below. Use the current manual for your exact model. Featured scene is AI-generated editorial imagery; schematics are original simplified illustrations.
Finish the rest of your winter storage plan
This procedure focuses on water-system protection. Use the RV winter prep checklist for batteries, exterior inspection, moisture, and storage visits. Inspect the tongue and bumper using our RV frame care guide before putting the trailer away.
Keep building capability
Useful notes for the road ahead.
Practical RV travel advice, connectivity tips, preparedness guides, and carefully selected gear recommendations—delivered to your inbox. Join the OWS Club and get the free 25-Point RV Departure Checklist. Practical advice. No inbox clutter. Unsubscribe anytime.